
The internet has plenty of data however, smaller percentage of that is accessible in easily usable format i.e. data is not accessible for download easily. In case, data has a small size, we could copy that from the web as well as do analysis however, what if the data size is big and it is very awkward to manually copy-paste the data. That is where web scraping has a role to play.
What is Web Scraping?
Web scraping services is the procedure of extracting or collecting data from the web. At times, it’s known as spidering, crawling, or web harvesting. Just copying data from the internet could also be known as web scraping however, usually when we discuss about scraping the web, we refer to the automated procedure where we can extract data through writing a programming code.
This blog is about the people who are completely new to the scraping concept. Here, we will extract job postings data from naukri.com, a leading job aggregator website.
Libraries Needed
Two most vital Python libraries, which we would require for web scraping include BeautifulSoup and Requests. Requests library is utilized to send HTTP requests to the web pages, it reply a Response object having all data from the web pages. BeautifulSoup is utilized to parse a HTTP returned reply object in the tree-like structure so that we could scrape necessary data from a response object very easily. Although, in the particular project, we might also require Selenium to have the HTML resource of web pages. You don’t need Selenium constantly to do web scraping however, when you can’t get a HTML resource as a response then you could use that. We will show you how it’s made in the given section.
We will extract naukri.com for job postings like ‘Financial Analyst in Mumbai’ during this project. It’s time to go step-by-step.
Step 1: Installing and Importing the Libraries
In case, you don’t have BeautifulSoup and Requests installed, then please do it using the pip command.
pip install requests
pip install beautifulsoup4
In case, you don’t get the Selenium installed, then install it. Once the libraries got installed, import as follows.
import requests
from selenium import webdriver
from bs4 import BeautifulSoup
import time
import pandas as pd
Step 2: Inspecting the Web Pages and Extract HTML Content from the Web Pages
Let’s inspect a web page initially, which we want to extract. Visit naukri.com as well as search for the profile “Financial Analyst” in Mumbai.
The resultant URL for the job search will look like this.
URL: https://www.naukri.com/financial-analyst-jobs-in-mumbai?k=financial%20analyst&l=mumbai
Here, the enquiry parameter is after the question mark (?) therefore, you can alter parameters k for a profile as well as l for the location depending on your requirements and this will search the jobs accordingly.
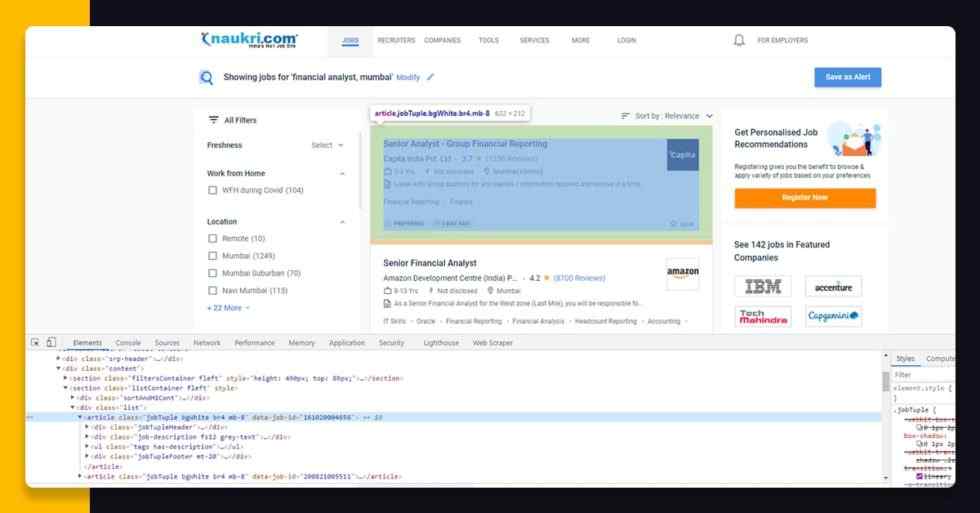
After job search, in case, you press F12 key or make the right click on a job posting cards → Inspect and then you might see the given result. (You might also utilize Chrome →More tools →Developer tools and also hover the HTML tags for recognizing the correct tags for the data.)
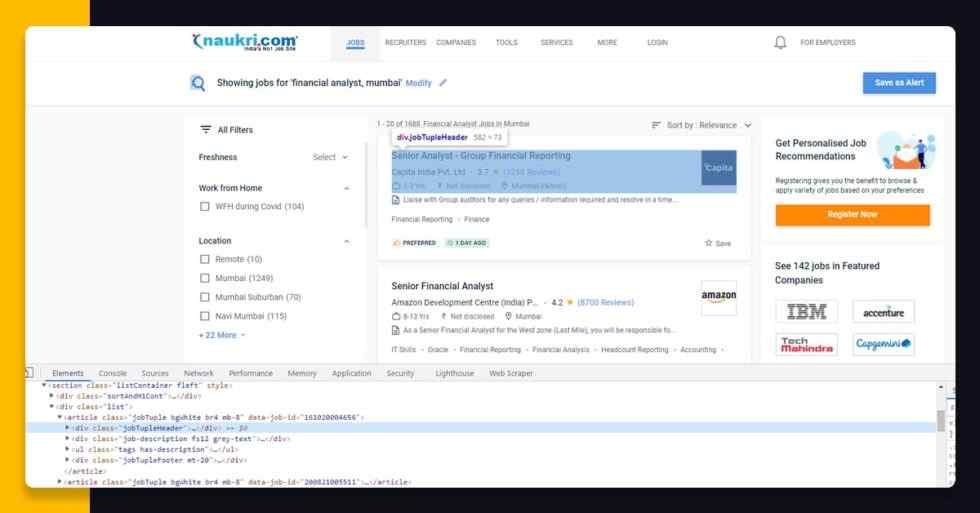
Become familiar with the HTML structure of the page as this will assist you to scrape the necessary data. A web page is prepared of different HTML tags therefore, it is extremely important to know the structure as well as see where the data is available. On the naukri.com page, whenever you make a right click on the job card as well as inspect, you will see equivalent HTML tags of the source page. Here, you can observe the HTML code of a first job post card available within <div> tag that is nested inside <article> tag that are nested inside <div> tag.
As you have assumed a page structure, let’s understand the deep part of the blog.
Let’s load a URL as well as send a HTTP request to a web page with requests library.
url = “https://www.naukri.com/financial-analyst-jobs-in-mumbai?k=financial%20analyst&l=mumbai"
page = requests.get(url)
page.text
Although, the reply object refunded by the HTTP request of a requests library doesn’t get HTML tags. Let’s see here:
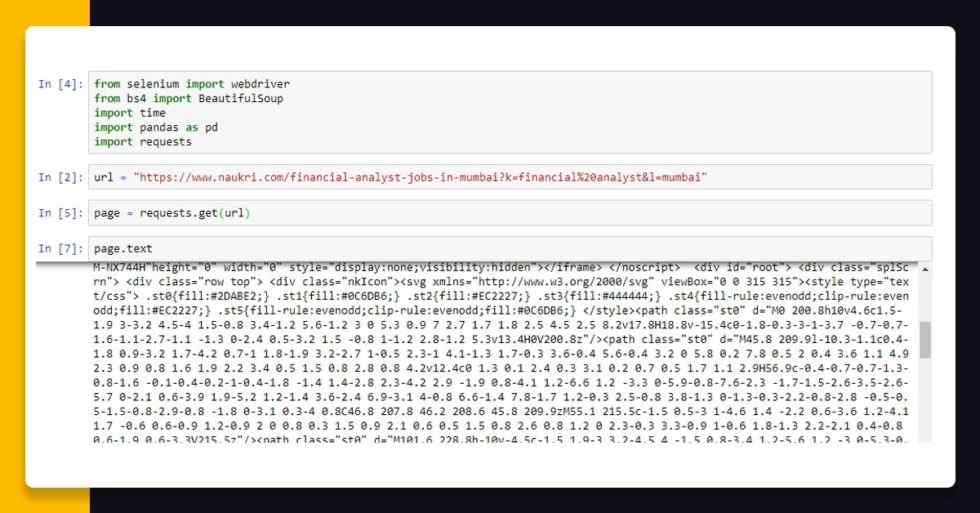
Therefore, to get a HTML resource of a web page, we should use Selenium library of Python used to do automation. Here, we are using Chrome webdriver.
driver = webdriver.Chrome(“D:\\Selenium\\chromedriver.exe”)
driver.get(url)
time.sleep(3)
soup = BeautifulSoup(driver.page_source,’html5lib’)
print(soup.prettify())
driver.close()
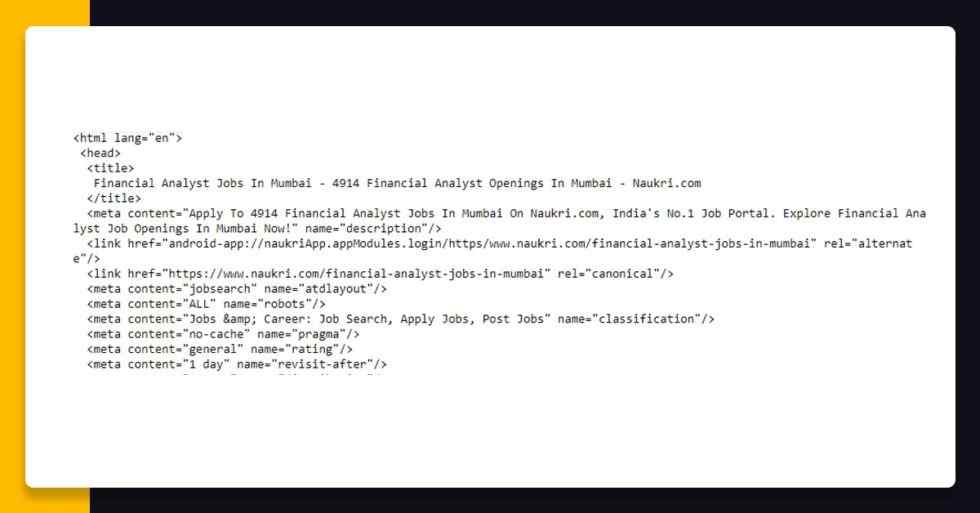
When we reach a web page, then we call a BeautifulSoup function from bs4 library for parsing a page source that converts the page to a HTML tree. We have used prettify() function to make the HTML content look better on a screen. That’s how the output look will look like:
Step 3: Scraping Data from the HTML Tags
Different data fields we are interested in include “Title”, “Ratings”, “Reviews”, “Company Name”, “Salary”, “Location”, “Experience”, “URL” and “Job Post History” to apply the job. Although here we will only diplay how to scrape data for Company, Ratings, Title, Reviews as well as URL; data for different fields you could scrape on your own. Here, we will make a blank data frame for storing these fields.
df = pd.DataFrame(columns=[‘Title’,‘Company’,‘Ratings’,‘Reviews’,‘URL’])
In case, you observe closely in a HTML page source, all the job cards are having their own <article>……</article> tags that are nested inside a <div> tag having class “list”. Therefore, we would bring all the tags within the <div> tag in the variable using BeautifulSoup that helps you find fundamentals of any particular HTML elements using its Class Name or ID. Here, we would utilize find() technique on a BeautifulSoup object called “soup”. It would return all the data inside <div> tag having class “list” in the object called “results”.
results = soup.find(class_=‘list’)
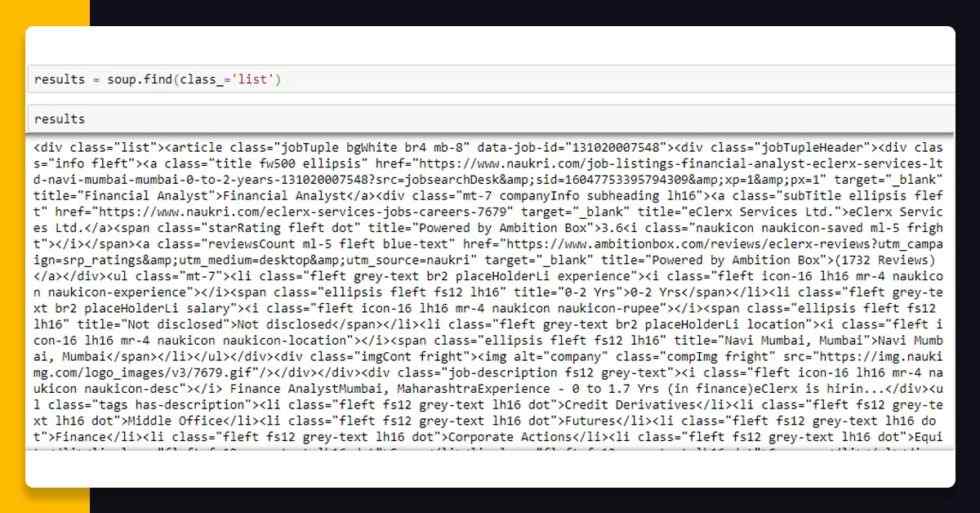
Now, here, we have got all the HTML elements inside<div> tag having class “list” with “results” object. From here, we can look for the all<article> tags having class “jobTuple bgWhite br4 mb-8”. Here, the given piece of code would return us the Python listing of<article> tags that we can repeat upon to scrape data from every<article> tag. For doing that, we will call find_all() technique on BeautifulSoup thing “results”. The main parameter in the find_all() technique will be the tag called i.e. “article” as well as the second parameter would be a class name for the tag.
job_elems = results.find_all(‘article’,class_=’jobTuple bgWhite br4 mb-8')
In a web page resource having <article> tag, you would observe an anchor <a> tag having class “title fw500 ellipsis” that is fundamentally the link for applying the job as well as a Title for a job.
We could scrape URL to apply the job as well as job title that are within <a> tags using the get(“href”) utility for URL as well as .text attribute for Title for an entire page.
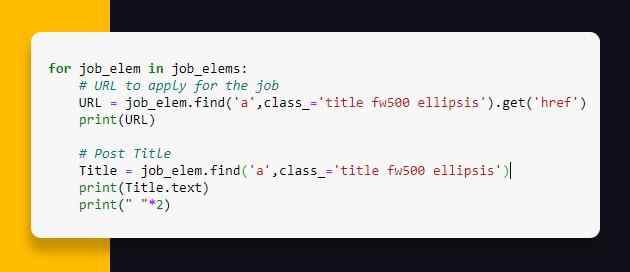
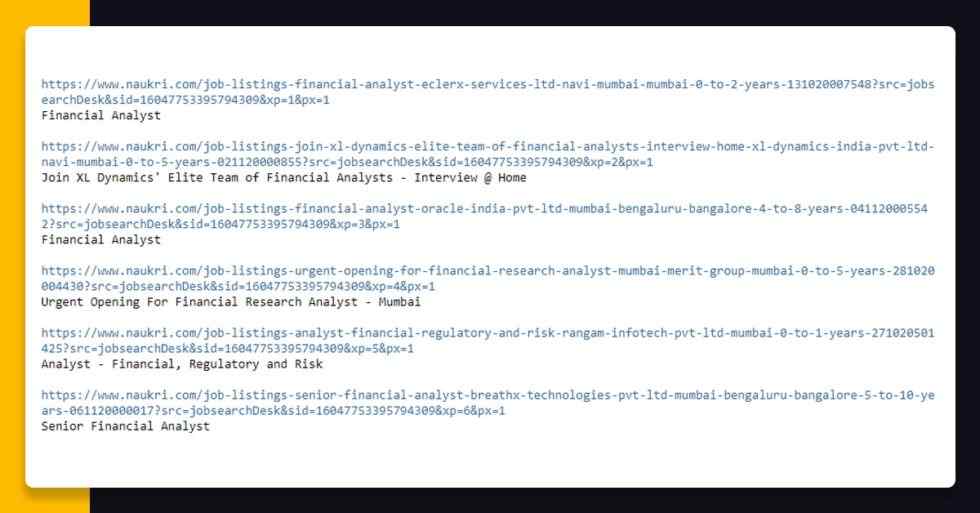
Let’s see how the scraped data will look like while printing both variables i.e. Title and URL.
As we have scraped data for different fields that is wonderful as we can scrape job postings data for the other fields also. Although, you will need to make some adjustments with this code as the page structure would be a bit different for every field. Scraping company name is just like what we have completed in the past, just ensure to change a class name with “subTitle ellipsis fleft”.
Although, for fields like Ratings and Reviews, we require to do a few adjustments. Not all job cards has ratings and reviews in that therefore, if we use the similar method given, a code would provide a trace back similar to “‘NoneType’ object having no attributes ‘text’”. What it means is, a job card having no ratings and reviews, returns “Nothing” when we find them through tag as well as class name. Applying .text attributes on “None” kind returns the trace back. Therefore to avoid that we would make some adjustments in othe code.
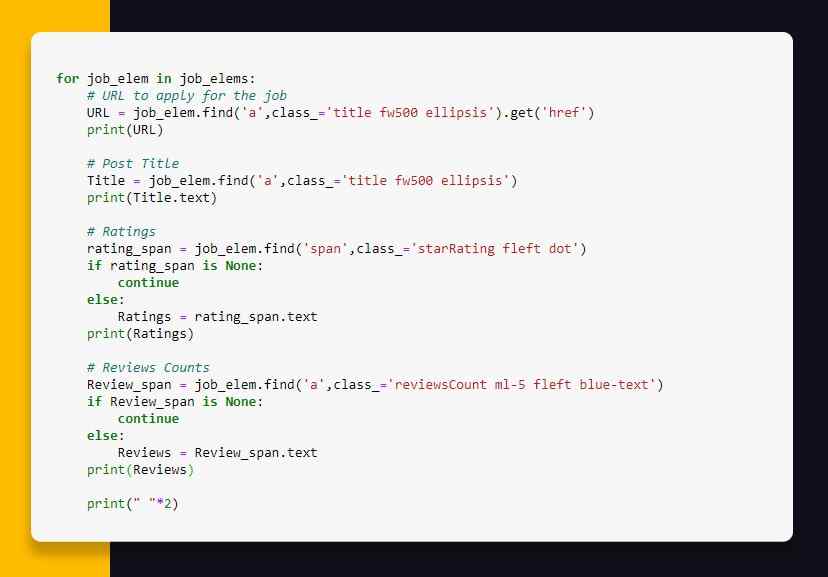
The result would look like this:
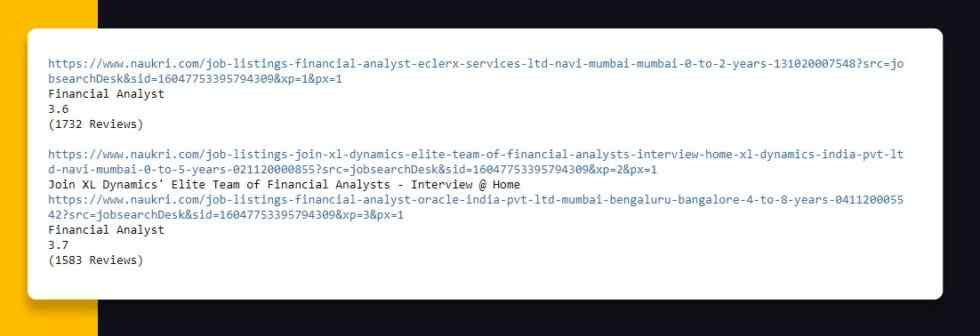
As you know how to scrape HTML element data, you can scrape different data points also.
Now, let’s collect the data that we have gathered and feed that into empty data frame ‘df’ to see how the data looks. See the highlighted code given below.
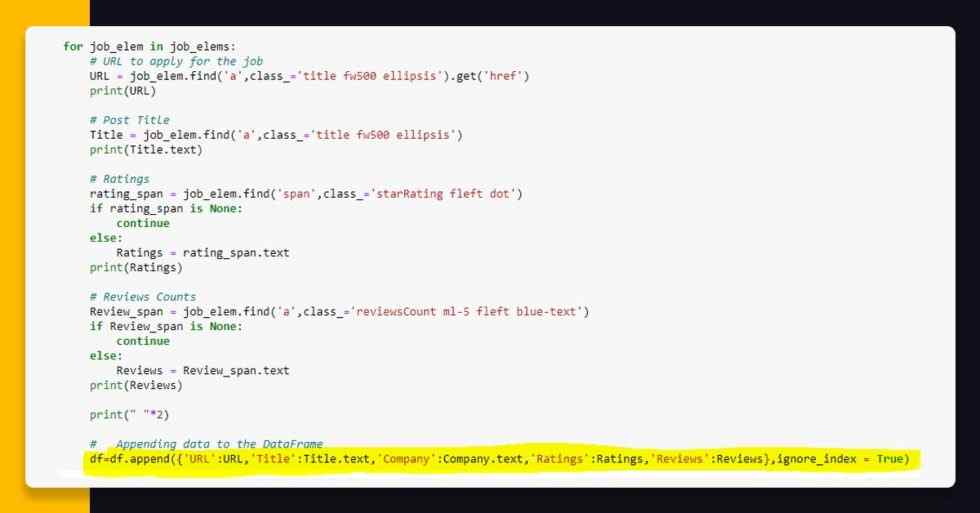
Now, it’s time to see head of the data frame having df.head() as well as see how that looks.
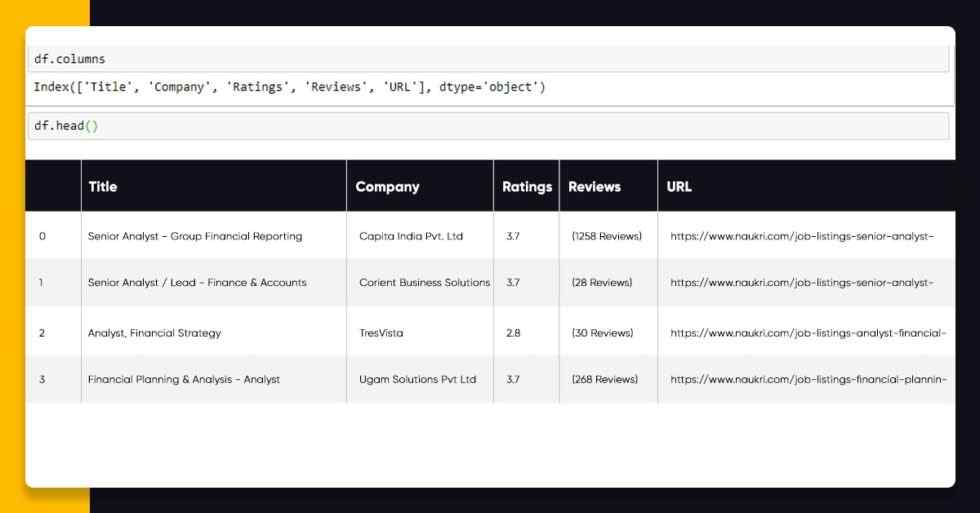
You can utilize df.to_csv(“Naukri.com_Data.csv”,index=False) as well as export the data frame into the CSV file. You need to scrape Salary, Location Experience, as well as Job_Post_History.
The data requires some cleaning that you could do in Python and Excel.
Note: Please be aware of the website sources while scraping some sites. Sending too many requests to the site may cause loading on the web server; therefore, it’s always sensible to send sequential requests (if necessary) in breaks, not together, as well as keep requests to a minimum.
If you want to know more about scraping job aggregator sites, web scraping naukri.com, or want this service, then contact X-Byte Enterprise Crawling or ask for a free quote!


